
Camellia Planting Demonstration
By Dennis Bilyeu - Updated 1/28/2009
Planting Philosophy:
Before you Plant:
When purchasing plants, pull the desired plant out of the pot and check root development near the outer edge of the dirt. Ideal root development will have lots of white roots all around the outer edge and bottom. If your plant does not have this either select another plant that does or plan on waiting about a year before planting this plant. If you purchase a plant and plan on keeping this plant in a pot to complete its root development, remove as much of the pine bark mulch as you can without doing serious damage to the roots and re-pot this plant (in the same pot) using a premium Azalea/Camellia mix soil. Add about a quarter cup of a root stimulating fertilizer (10/20/10) to help decompose the organic matter in the new soil (and the remaining pine bark mulch) and to feed the root development.
Understanding Nursery Development of Own-Root Plants:
Plants in Pots are grown with a concentration of slow release fertilizer (Osmocote) in the center of the root ball. The roots tend to grow around and inward toward this fertilizer ball. We need to transform this root development to a radial outward growing root system that will give this plant the best chance of surviving in our native soils. Most nursery plants are grown in a pine bark mulch and sand mix, which do not have good plant nutrient levels. The nutrients are provided by the fertilizer and when the fertilizer depletes the remaining soil is a poor growing medium. Camellia roots are said to dislike being disturbed so during the planting process we need to minimize root damage. The following procedure attempts to use water to manipulate some of the roots into the desirable radial outward configuration, to wash most of the Osmocote type fertilizer out from inside the root ball, and to wash some of the organic mulch/sand mix out from the top part of the root ball. The bottom half of the root ball is relatively undisturbed to provide the plant with a stable root feeder system that supplies nutrients to the plant as the top half of the root ball is developing its new outward radial growth roots.
Key Information:
- Japonica Camellias like partial sun with about 6 hours of direct sun a day.
Sasanqua Camellias will tolerate full sun conditions better than Japonicas. I have found a good indicator of sunlight is grass growth. If you have some shade but grass still grows in the area, you probably have the right amount of sunlight. Camellias will grow where grass will not grow but their growth rate will be slow. - Camellia roots must have ready access to air to grow properly.
- Camellia plants are slow growing and need special care for the first three years after planting.
- Camellia roots generally like to be dry rather than wet; so, error on the dry side when watering especially with larger mature plants and when you have a heavy clay soil.
- When planting Camellias under large trees, use larger spacing between Camellias (>5feet), mound up more organic material under the Camellias and add more nutrients (fertilizer) to compensate for the competition with the larger tree roots.
It is also generally a good idea to trim any low hanging branches on the large tree to allow more light and air circulation to reach the Camellias. - Before planting your Camellia, bring the plant in out of the rain and do not water for at least a week to allow the root ball and dirt to dry out. This helps prevent damage to the roots when taking the plant out of the pot and helps in the removal of the undesirable soil and Osmocote from inside the root ball.
Planting Procedure:
Note; It is much better to plant a $5 plant in a $50 hole than to plant a $50 plant in a $5 hole.
- Dig hole
- Pile dirt around edge of hole to form a dam
- Dig hole several inches deeper and wider than necessary
- Mix about 50/50 native soil and Camellia/Azalea mix or potting soil
- Form a mound of this mix in the center of the hole
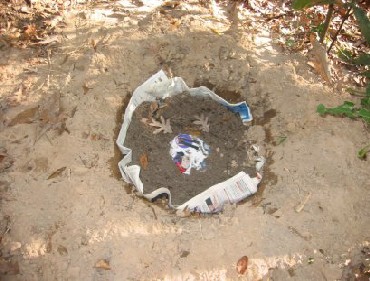
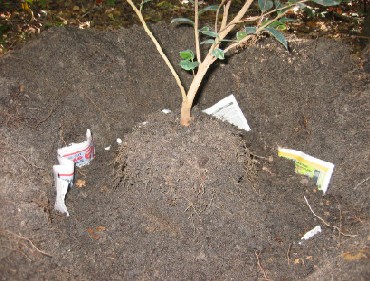
- Use newspaper for root separation from nearby trees
- Lay several layers of newspaper sections (>5 sheets) over mound of mix
- Make sure newspaper goes down sides of mound and back up outer wall
- Set elevation of plant
- Add C/A mix over newspaper to desired elevation
- Set plant on top of mound several times compacting the mix
- Repeat as necessary to set proper elevation, which should be with about half the height of the root ball above natural ground. The heavier (more clay/less sand and organic material) your native soil, the higher you need to set the plant elevation.
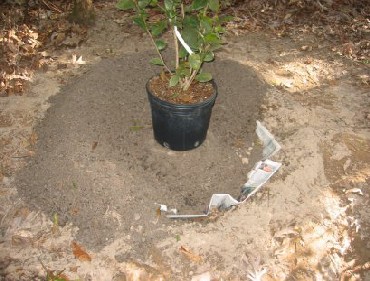
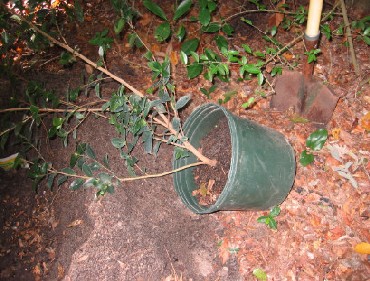
- Loosen plant from pot
- Lay the pot on its side and hit the outside of the pot with the palm of your hand as you roll the pot all the way around
- Set plant in hole
- Stand over hole and turn pot upside down, supporting the plant with one hand with fingers on either side of the plant trunk.
- Plant should slide out of pot
- Excess dirt should fall into hole
- After removing pot place other hand on bottom of root ball and turn plant right side up and set in center of hole. Rotating the plant to achieve optimum orientation.
- Add dirt to stabilize plant
- Fill hole with C/A mix up to about half the height of root ball
- Tilt and prop plant with C/A mix to achieve good vertical orientation of the upper part of the plant
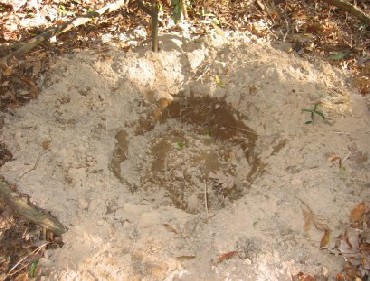
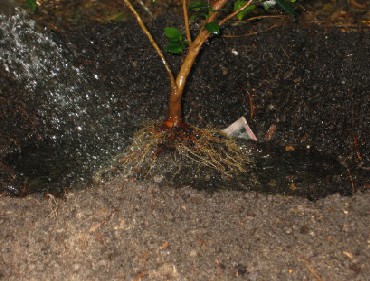
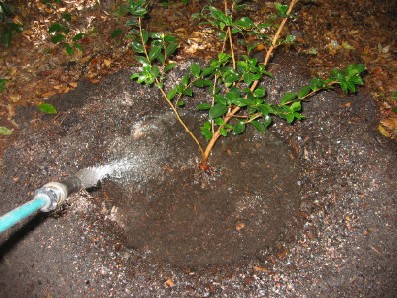
- Water wash top roots
- Barely open water valve to hose with adjustable nozzle on end
- Adjust nozzle to produce a gentle spread out water spray
- Wash top of root ball until top layer of roots are loose. Wash until you see white or new growth roots.
- Use water and nozzle to arrange these loose roots in a radial pattern
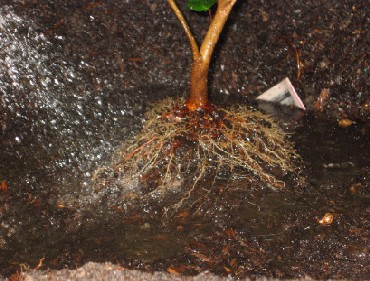
- Flush out fertilizer ball
- If you notice yellow Osmocote fertilizer coming out of the center of the root ball when washing the roots, adjust your nozzle to a tighter water spray and flush out the fertilizer into the outer diameter of the hole.
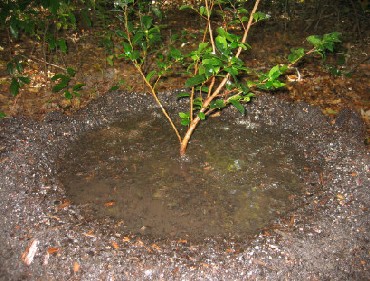
- Add dirt to outer edges of roots
- Let the initial water flush drain and add C/A mix up to just below the top of the root ball, filling from the outer diameter of the hole
- At this point I like to add a little fertilizer to the dam and outer part of the hole. The fertilizer I use is a 10/20/10 which promotes strong root development and helps complete the decomposition of the C/A mix into a nutrient rich compost.
- Water dirt and fertilizer in thoroughly
- Wash the C/A mix into the root ball from the outer edge of the hole to fill the void created by washing out the Osmocote fertilizer
- Wash the new fertilizer down into the outer edge of the hole not into the root ball
- Let water drain and add more dirt to just cover the root ball
- Water in and add more dirt as necessary
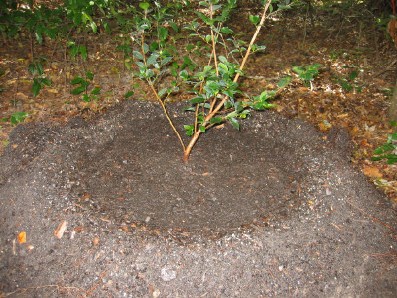
- Compact sides of mound
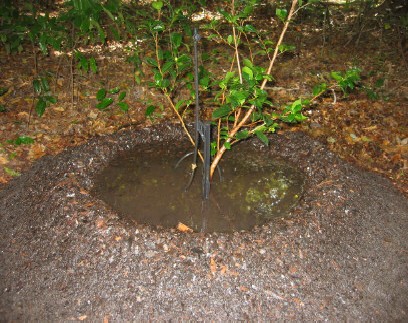
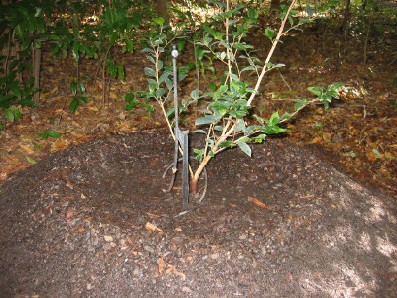
- Add dirt to create a volcano shaped water dam at least 2 inches higher than top of roots
- Water in to finished elevation
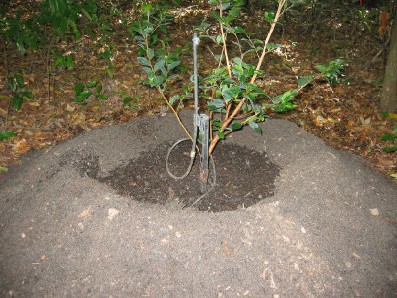
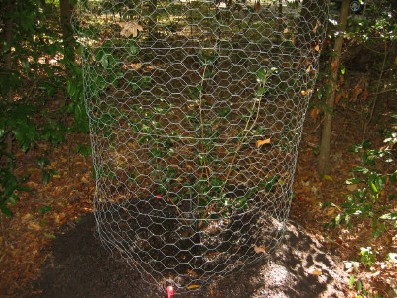
- Add sprinkler and fencing as necessary
- Water plant every other day for at least two weeks
- Fill the dam area with water so the roots are soaked from top to bottom
- Cover soil around plant with at least two inches of mulch (ground up pine needle mulch is ideal)
- Label your plant with its name and place the label where it will not be covered with mulch and leaves.
- Planting in the fall is the best time of the year because of the cooler temperatures and frequent rain fall. If you experience extended periods without rain give your plant a thorough watering every two weeks in the cooler months and every week in the hot part of the summer. This schedule works well for sandy soils. If you have heavy clay soils add a week to the above watering schedule.
Tools and materials used:
- Wheelbarrow of Camellia/Azalea mix
- Shovel
- Water hose with adjustable sprinkler nozzle
- 10/20/10 fertilizer
- Name label and marker
- Permanent water sprinkler
- Fencing and stakes